Front and Rear Leaf Springs Installation Guide
Review the below step-by-step guide for the preparation and installation of both front and rear composite leaf springs.
Front Spring Installation Prep.
1. Raise and support the vehicle by lifting the car at the appropriate jack points.
2. Remove tire and wheels from vehicle.
(It will be necessary to do the following steps to both the left and right suspension components).
3. Remove the lower shock absorber mounting bolts from the bottom of the lower A-arms (fig. 1).
4. Disconnect the stabilizer link from the lower A-arms (fig. 1).

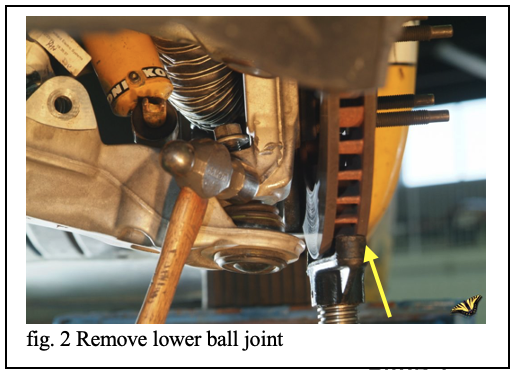
5. Loosen the lower ball joint nut on the A-arms. Do not remove the nut. Leave 3 threads of engagement. Separate the ball joint from the knuckles. If a ball joint separator tool is not available, the joint can be separated by lifting the rotor and hammering a sharp blow on the side of the knuckle right on the ball joint area (fig. 2).
6. Place a support under each A-arm one at a time and remove the ball joint nut. Slowly lower the A-arm (fig. 1).
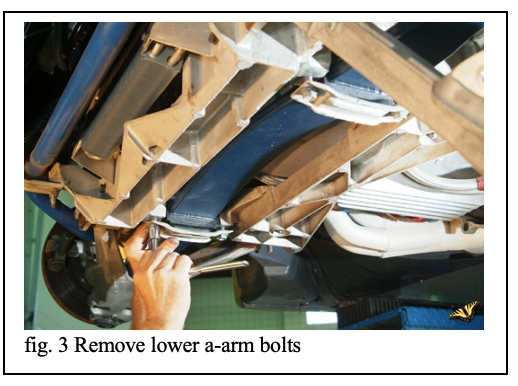
7. Remove the spring retainer brackets (fig. 3).
8. Remove the original spring by moving it to one side in order to clear the other side's lower A-arm.
9. Clean any road dirt from the lower A-arms and cradle.
Front Spring Installation
You are now ready to install your new front spring. Apply a light amount of anti-seize on the thread and a small amount of grease on the bottom of the adjuster, aiding you later when your ride height and weights are adjusted. Install your new front spring adjusters into your Hyperco spring until they are seated.
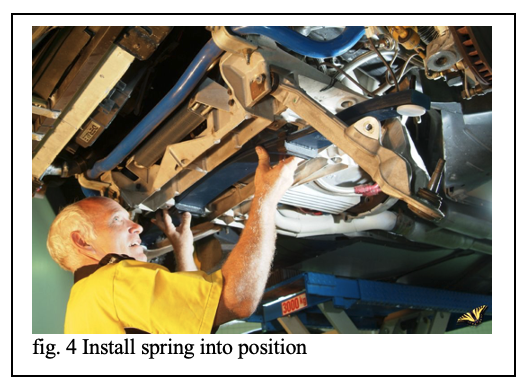
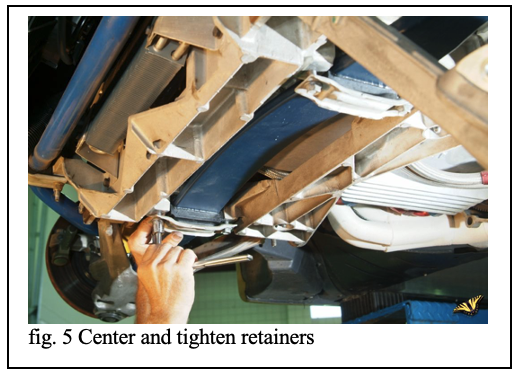
1. Install the new Hyperco spring into the cradle mount locations and lightly tighten the spring retainer brackets (fig. 4). Care should be taken to ensure the spring is properly centered. Alternate the tightening of each retainer bracket a turn at a time to assure proper alignment. (fig. 5).
2. Place a support under both lower A-arms. Slowly raise the A-arms. Install and tighten the ball joint nut. (ball joint nuts torque 52 lb. Ft.)
3. Connect the stabilizer link into the lower A-arms and tighten. (production stabilizer link nut 53 lb. Ft.). If links are aftermarket, follow their torque settings.
4. Install and tighten the lower shock absorber mounting bolts into the bottom of the lower A- arms. (shock absorber lower mounting nuts 21 lb. Ft.)
5. Tighten the spring retaining bolts. (spring retaining bolts 46 lb. Ft.)
6. Install wheels and torque to proper specifications
Rear Spring Installation Prep.
1. Raise and support the vehicle.
2. Remove tire and wheels from vehicle.
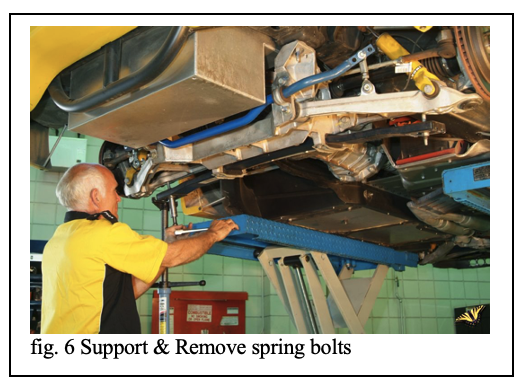
3. Support the spring ends and remove the bolts and insulators retaining the spring to the lower control arms (fig. 6).
4. Remove the rear spring mounting brackets from the cross member.
5. Remove the original spring.
6. Clean any road dirt from the lower A-arms and cradle.
Rear Spring Installation
You are now ready to install your new rear spring.
1. Install your new Hyperco spring into the cradle and lightly tighten the retainer mounting brackets.
2. Support the left end of the spring and install bolt, insulators, and nut. A light amount of anti-seize on the tread will aid later when adjusting the ride height.
3. Support the right end of the spring and install bolt, insulators, and nut. Again a light amount of anti-seize on the tread will aid later when adjusting the ride height.
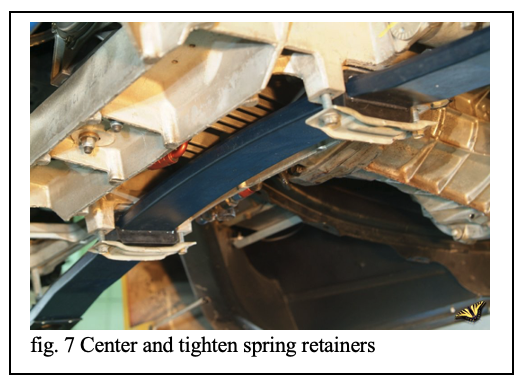
4. Center the spring and slowly tighten the spring mounting bolts to the cradle (fig. 7) (Spring retaining bolts 46 lb. Ft.).
5. Install wheels and torque to proper specifications
Ride Height, Alignment, and Corner Weighting
The vehicle can now be lowered from the hoist to the ground. Anytime the vehicle is raised, it must be moved (at least forward and reverse) to settle ride height. Set ride height to desired height before alignment or scaling. Front ride height can be raised or lowered by adjusting the front spring adjuster. Rear ride height can be raised or lowered by adjusting the rear spring brackets.
Alignments will vary as to the type of driving you plan to do. Autocrossing or competition track driving will require a more aggressive alignment. Consider your vehicle usage before settling on your alignment.
Scaling or corner weighting should be done after your ride heights and alignment has been set. Corner weighting is highly recommended for optimum performance. Weight cannot be moved from front to rear however it will shift on the diagonal (i.e. left rear/right front to right rear/left front).
Contact Us
For more information on Hyperco products, capabilities, or resources, contact us.